The article editor
Write and revise drafts in ContentForge — formatting toolbar, images, tables, autosave, comments, the sources rail, and metadata.
The editor is where you write and revise a topic's draft. You reach it by clicking any topic card. The main column is the editing surface; the formatting toolbar sits above it and stays pinned to the top as you scroll.
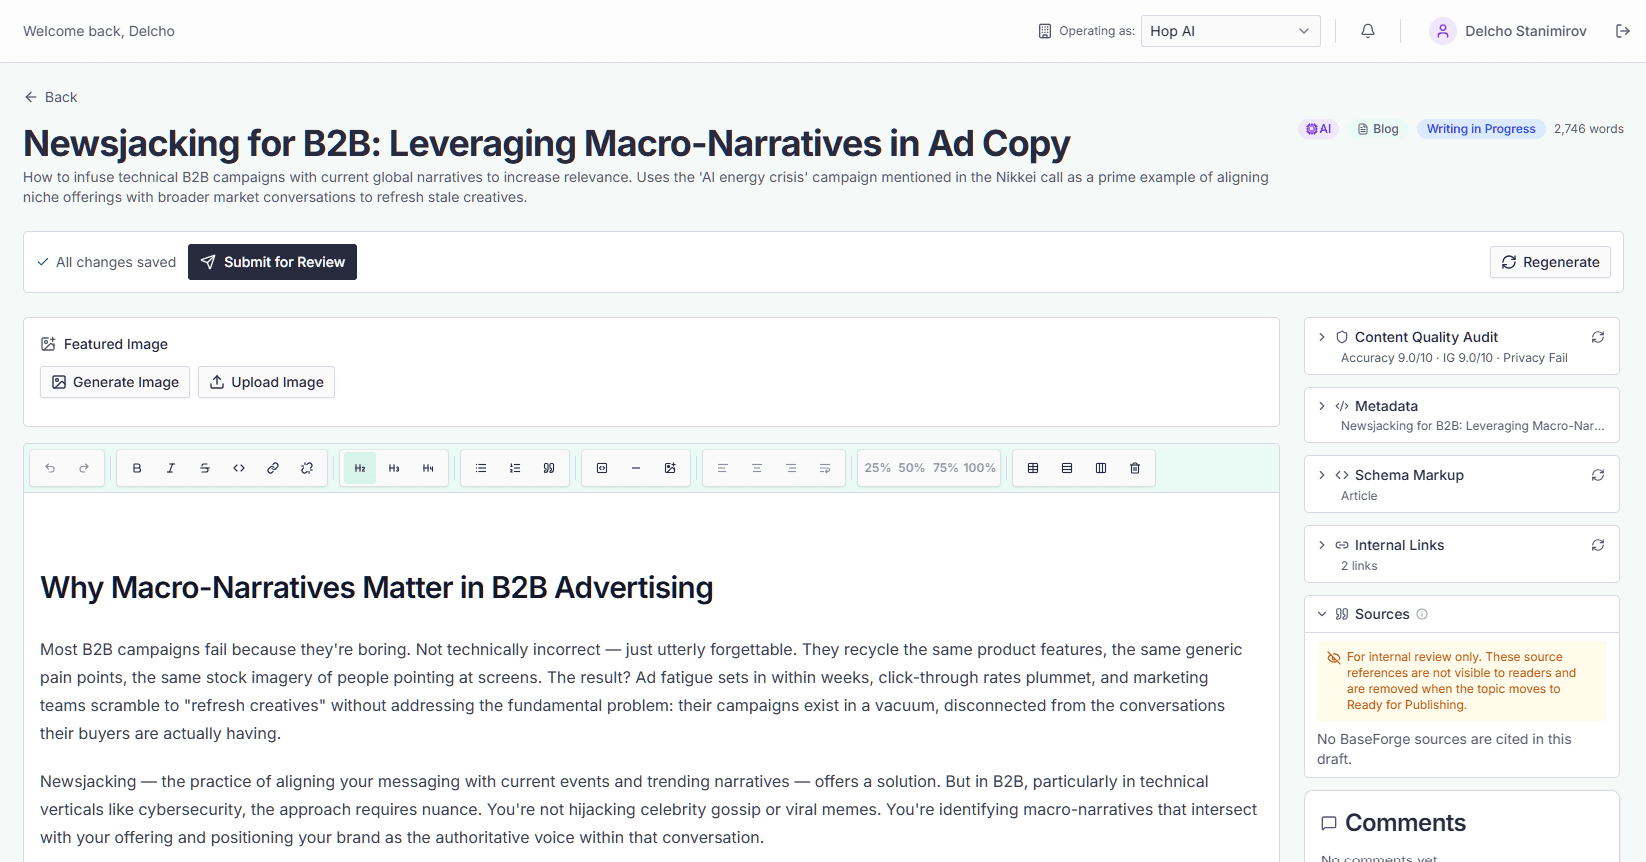
Formatting toolbar
The toolbar is grouped left to right:
- Undo / Redo — step backward and forward through your edits.
- Inline formatting — bold, italic, strikethrough, inline code, insert link, and remove link.
- Headings — Heading 2, 3, and 4.
- Lists and blocks — bullet list, ordered list, blockquote.
- Blocks and media — code block, horizontal rule, and insert image.
- Image controls — align left, center, or right; wrap text around the image; and width presets of 25%, 50%, 75%, and 100%. These activate only when an image is selected.
- Tables — insert a table, add a row, add a column, and delete the table.
To add a link, select text and click the link button, then enter the URL. Pasting a URL or typing a domain does not create a link automatically — only the toolbar does.
Inserting images
Click the insert image button to open the image dialog. It has two tabs:
- Upload — drag in or pick a JPEG, PNG, or WebP up to 10 MB. Add alt text before inserting.
- Media Library — pick from images already uploaded for this brand. Selecting one prefills its existing alt text, which you can edit before inserting.
Uploaded images are saved to the brand media library, so you can reuse them in other drafts.
Autosave and status
Your edits save automatically as you pause — there is no manual save button for the body text. Saving behaves differently depending on the topic's stage:
- Editing a draft or a topic in Ready for Review leaves its status unchanged.
- Editing a topic in Ready for Publishing or one that's already Published moves it back to Ready for Review, so the change is reviewed again.
A draft advances to review through the explicit "Submit for Review" action, not by editing.
Version history and undo
Undo and redo cover edits within your current session. Beyond that, the editor records version snapshots at checkpoints — for example when you pause or step away — so a saved draft is always restorable if a later change or an automated pass overwrites it.
Comments
You can comment at any status. To leave a comment tied to specific text, select the text in the editor and click Comment in the small menu that appears above the selection. The highlighted passage shows as a quote in the comment thread.
Type @ to tag a teammate; they get a notification. Comments can be resolved and later reopened. Clicking a highlight in the document scrolls to its comment, and clicking a comment's quote scrolls back to the highlight. If the highlighted text is deleted, the comment is marked as removed and loses its click-to-scroll link.
Review feedback
When a reviewer sends an article back for changes, the note they wrote appears in the Comments panel under Review feedback — so everything you need to act on is in one place, rather than the inline comments being here and the reviewer's note buried in the Activity log.
These entries are read-only: they're a record of what the reviewer asked for, not a thread to reply in. Use an ordinary comment if you want to discuss one.
Each note has a Locate in content button that finds the passage the reviewer was talking about and scrolls to it. It works even when a reviewer paraphrases or slightly misquotes the draft, because it matches approximately rather than exactly. If it genuinely can't find the passage — usually because the wording has since been rewritten — it tells you so instead of silently doing nothing.
Sources rail
While a draft is being written or reviewed, the Sources panel lists the BaseForge documents behind the draft's inline [Source N] citations. Each entry links to the source document, and an excerpt shows what was cited.
The numbering matches the [Source N] markers in the text, so it can skip numbers (for example 1, 2, 4, 7) — only sources actually cited appear.
These references are for internal review only. They are never visible to readers and are removed when the topic moves to Ready for Publishing, at which point the panel disappears.
Side panels
Alongside the editor you'll find collapsible panels for the rest of a topic's setup:
- Metadata — article title (H1), URL slug, live URL, SEO title, meta description, and per-CMS publishing options like author and categories.
- Schema Markup — the JSON-LD generated for the article, which you can edit or copy.
- Internal Links — suggested and manually added links to your other published articles, with an option to apply them to the draft.
- Featured Image — generate, upload, or replace the article's hero image.
The URL slug locks once the topic is published and can't be changed afterward.
The out-of-date-year warning
If the slug or the SEO title carries a year that has already passed, the Metadata panel says so. It is worth fixing: comparing pairs of pages on the same site that answer the same question, the one whose URL showed the newer year was cited by AI engines about twice as often. Because the slug locks at publish, this is one of the few things that is nearly free to change now and awkward to change later.
It is a warning, not a block — you can save and publish with it showing.
Recording where an article went live
The Metadata panel includes a Live URL field — the public, reader-facing address where the article is published. Recording it is separate from publishing through GEOforge, so you can set it whether GEOforge published the piece or you posted it elsewhere yourself, and — unlike the URL slug — the Live URL stays editable after publishing.
GEOforge uses this address to attribute AI-bot crawls, search impressions, and AI-referred sessions back to the article on the Content Performance screen, so it must be on your brand's own domain — paste the reader-facing URL, not a CMS editor link. Click Save in the Metadata panel to store it.
Publishing a refresh
A refresh replaces the original article only when your CMS can find the original post. Before you publish, the publish window checks. If the refresh would go live as a second copy, it warns you, links the original, and says why. The usual reasons:
- The URL slug changed. The window shows both slugs. Change the URL Slug back to the original's to update it instead.
- The original wasn't published by GEOforge. Wix and Glycanage can only update posts GEOforge published itself.
- GEOforge couldn't find the original post, for example because it is in a different collection or post type.
If you publish anyway, the original stays live. Ask the site owner to add a permanent (301) redirect from the original to the new post, so readers and search engines aren't split between two copies. The publish window reminds you of this once the new post is live.